

It's only appropriate to make a very special Vegan Funfetti Cake to celebrate every occasion! Three layers of sprinkle-filled vanilla cake topped with vegan buttercream make this one of the best eggless & dairy-free layer cakes you'll ever make.

Wow, I can't believe ShortGirlTallOrder is two years old today! They say time flies when you're having fun, and I can tell you this blog is the most fun I've ever had.
You may remember that last year I celebrated my very first blogging anniversary with Vegan Funfetti Cinnamon Rolls and shared a quick recap of my biggest lesson learned in my first year of blogging.
This year, I've gotten to show people that plant-based cooking can be exciting, fun, and definitely NOT boring! I mean- hello?! This Vegan Funfetti Layer Cake proves that!

Steps to make a vegan funfetti cake
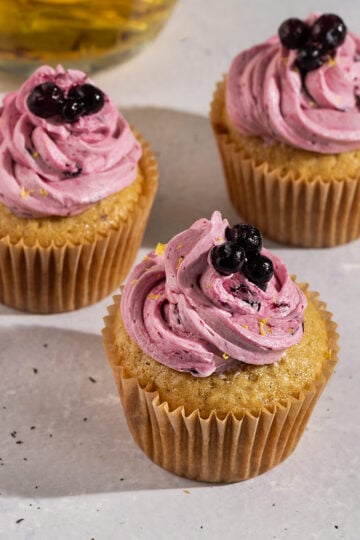
If you've never had an eggless funfetti cake, it's really just a vanilla cake filled with tons of sprinkles! In fact, I based this entire cake recipe off my favorite Vegan Vanilla Berry Cupcakes and Vegan Funfetti Cookies!
First, prep the oven & baking pans
This step is super important. Before making the vegan confetti cake batter, turn the oven on to preheat to 350F. At this point, you also want to prep the baking pans. To do this line the bottom of each baking pan with parchment paper and then lightly grease the sides of the pan so the cake doesn't stick.
The reason why we do this step first is so the cake can be added to the oven right after we add the sprinkles to the cake batter. Otherwise, their color may bleed into the cake batter.
Then, make the funfetti cake batter:
Luckily, the easiest part of making this vegan birthday cake is making the batter. It can easily be made in one large mixing bowl and then poured in equal amounts into three separate baking pans. Plus, this recipe can easily be adapted to just make one-layer or two-layer cake.

First, mix all the wet ingredients together. Then, add in the dry ingredients including the pastry flour, baking powder, and baking soda, and salt.
I like using pastry flour in this recipe as it leads to a light and fluffy cake. However, if you only have all-purpose on hand just replace 2 tablespoon of each cup of pastry flour with 1 tablespoon cornstarch.
Don't add the sprinkles until everything is mixed & the oven is preheated
This part is super important! Once the cake batter is ready, add in the sprinkles and use a spatula to VERY gently fold them in. Then, immediately add the batter to the pans and bake the cake. Otherwise, the color of the sprinkles may bleed into the cake batter.
Bake in three 8" springform pans
The baking time for each vegan rainbow cake is 35-40 minutes. I love using a springform pan as it allows for much easier removal of the cakes after baking. If you only have a 9-inch pan that will also work, but the cake will be significantly thinner and will need only about 25-30 minutes of baking time.
Let cool completely before frosting
Once the cakes are out of the oven, I like to run a knife around the outside of the cake to loosen any cake that may be sticking to the pan. Then, remove the cakes and flip them upside down onto a cooling rack.
Once they are completely cool, frost them!
Pro Tip: I like to bake my cakes the day BEFORE frosting them. While I don't normally recommend refrigerating cakes or cupcakes, I make an exception with layer cakes as it makes them easier to frost.
To store cakes the day before frosting, wrap each cake tightly in plastic wrap and store in the fridge for 1-2 days before frosting. The plastic wrap should prevent the cake from drying out.

How to assemble a vegan layer cake
Now comes the fun part- frosting the vegan layer cake! I've put some process shots for you below, but the key is to make sure the cake and frosting are cold during each step. While I am going to break it down for you, I also recommend checking this guide on How to Frost a Layer Cake for even more step-by-step pictures.
Supplies/ Tools:
- Cake Turntable
- Cake Decorating Spatula/ Off-Set
- Icing Smoother
- Piping Bag & Decorating Tips
- Rubber Spatula
- Sprinkles
Here is the basic cake decorating kit I have that contains a cake turntable, 2 Icing spatulas, an icing smoother, and some decorating tools. Unless you plan on decorating cakes often, a simple set like this is really all you need!
First, we're going to stack the cakes and cover each cake with a layer of frosting. For each layer, I add about ⅓ cup of frosting. Since this cake is already so sweet, I didn't add in a super thick layer of frosting between the layers.
To make frosting the cake easier I used my icing spatula to spread out the frosting. After one layer is done, pile on the rest until you have three layers of cake and three layers of frosting!

What is a crumb coat?
Now that your cake is stacked and frosted, it's time to do a crumb coat! A crumb coat is a thin layer of frosting that's spread over the cake first. This first layer of frosting helps to prevent stray crumbs from getting caught in the final layer of frosting (below image, the first picture on the left is the cake with my crumb coat)
This layer doesn't have to be perfect and it's really about sealing in those cake crumbs.
After the crumb coat of frosting is on, add the cake back to the fridge for at least 30 minutes before adding on another layer of frosting. Actually, you can also let the cake sit for 1-2 hours or even overnight with just the crumb coat on and the frosting should protect the cake from drying out!

Once the crumb coat has hardened to the touch, it's time for the final frosting layer!
Add on a thick layer of frosting and use the icing smoother to smooth it out. This is when the cake turntable comes in handy as it will allow you to turn the cake when using the icing smoother.
Then, decorate with all the rainbow sprinkles!
I decided to go all out and pretty much covered the entire vegan birthday cake in sprinkles! If you've wondered what vegan sprinkles are best for vegan funfetti cakes, I recommend India Tree or Sweetapolita. This cake features the Sweetapolita Birthday party sprinkle medley.
For a final touch, set aside ¼ cup of frosting and color it with food coloring (I used 3 drops of blue food coloring). Use a piping bag and decorating tip to make a colorful border on the top of your vegan rainbow cake!

I may be biased but I truly believe this Vegan Funfetti Cake is the perfect cake for any celebration. Honestly, it may even make another appearance at my 30th Birthday this year! I can't wait for you to try layer cake that is seriously so moist, light, & fluffy.
Cheers to two years of SGTO and many more sprinkle-filled years to come!
-TSG
More Vegan Cake Recipes You Will Love:


If you loved this recipe, please leave a 5-star review on the recipe card. I always appreciate your feedback and support! You can also follow along on my Instagram, Facebook, TikTok, and Pinterest, or sign up for our newsletter!

Vegan Funfetti Cake
Ingredients
Funfetti Cake Ingredients:
- 2 ¼ cup almond milk ¾ cup per cake layer
- 2 cups sugar ⅔ cup per cake layer
- 9 tablespoon oil ½ cup + 1 tablespoon total, or 3 tablespoon oil per cake layer
- 3 teaspoon vanilla bean paste 1 teaspoon per cake layer
- 3 ¾ cup pastry flour 1 ¼ cup per cake layer
- 1 ½ teaspoon baking powder ½ teaspoon per cake layer
- ¾ teaspoon baking soda ¼ teaspoon per cake layer
- 1 ½ teaspoon salt ½ teaspoon per cake layer
- ¾ cup rainbow sprinkles ¼ cup per cake layer
Vanilla buttercream frosting:
- 2 cups cold vegan butter
- 1 cup cold vegan shortening can be replaced 1:1 with vegan butter, but frosting will not be as soft
- 3-4 cups powdered sugar start with 3 and add more for a sweeter frosting
- 3 teaspoon vanilla bean paste/extract
- ¾ cup rainbow sprinkles optional, to decorate cake
- Food coloring optional
Instructions
Baking the cake:
- Start by preheating the oven to 350F. Then, prep the pans by lining each 9-inch pan with parchment paper on the bottom and lightly greasing the sides so the cake does not stick.
- Next, make the funfetti cake batter. Add the wet ingredients including the almond milk, sugar, oil, and vanilla to a large mixing bowl. Whisk to combine. Then, use a flour sifter to add in the pastry flour, baking powder, baking soda, and salt. Whisk together until a smooth cake batter forms.
- Once the oven is preheated add in the rainbow sprinkles and VERY gently fold them into the batter using a spatula. Do not overmix or the colors will spread into the batter.
- Pour the cake batter into each cake pan and bake at 350 for 30-35 minutes until browned on the top but still soft and fluffy. Check that the middle is cooked by inserting a toothpick and checking that no raw batter remains.
- Remove the cakes from the oven and gently run a knife along the outside of the cake to make sure it is not sticking to the pan. Let cool in the pan for about 5 minutes. Then, remove the cake and flip onto a wire rack to cool completely before frosting.
- At this time, either leave the cake at room temperature to cool or wrap in plastic wrap and let cool in the fridge for 1-48 hours. I recommend wrapping the cake in plastic wrap and refrigerating it for the best frosting results.
Making the vegan buttercream frosting:
- Once the cakes are cooled, make the vegan frosting.
- Add the cold vegan butter, cold shortening, and vanilla to a large mixing bowl and use an electric mixer to cream together on high speed. Once creamed, turn the speed to low and gradually add in the powdered sugar ½ cup at a time. Make sure to sift the powdered sugar before adding it to avoid any large clumps forming in the frosting. I like to start with 3 cups powdered sugar and add more for a sweeter frosting.
- Cover the bowl of frosting and add it to the fridge for 15-20 minutes to firm up.
Frosting the vegan layer cake:
- First, add a layer of parchment paper to a cake turntable and top with the first vegan cake. Add about ⅓-1/2 cup of vegan frosting on top and use a cake spatula to evenly smooth this frosting on top. It's okay if the frosting pour over the sides of the cake. Then, add the next layer of cake on top.
- Continue this process until all three layers of cake are stacked and frosted. Then, add on the crumb coat of frosting. Add a light layer of frosting to the sides of the cak, making use to fill in the gaps between layers with frosting. Then, use a cake scraper to smooth it out. It's okay if this layer isn't perfect as it's purpose is to trap in any stray cake crumbs.
- Once the crumb coat is complete, add the cake back to the fridge and let it sit for at least 30 minutes before adding the final layer of frosting. I like to add the remaining frosting back to the fridge at this time to firm up.
- After 30 minutes, remove the layer cake and frosting from the fridge. Set aside ¼ cup of frosting to color and pipe as a top border for later. Then, take the remaining frosting and frost the cake. Use a cake scraper to even out the frosting on the sides and top of the cake.
- Once the cake is frosted, take a handful of sprinkles and press it onto the sides of the cake. Sprinkles can also be added on top, but make sure to leave room for the colorful frosting border.
- As a final step, take the ¼ cup of frosting that was set aside and add it to a small bowl with your choice of food coloring. Add it to a piping bag and pipe a colorful border around the top of the cake.
- Add the cake back to the fridge to firm up before serving. Cut into even slices and enjoy!
Notes
- If you are not slicing into this cake right away, it can be stored in a box in the fridge.
- For a cake that has already been sliced, I recommend cutting the entire cake into slices and storing it in the freezer. Store in a closed container between sheets of parchment paper. Make sure to lay a sheet of parchment paper on the top layer of the cake so it doesn't get any freezer burn.
- Cake styling inspiration from StyleSweet who makes the most incredible frosted cakes!

Haleigh says
Hi! Love that I found this recipe. My daughter has egg allergy, along with nuts. Most cakes I’ve tried to make I’ve had to sub eggs with applesauce, flax or a combo of milk+ lemon juice. I’m excited to try this out, but would regular flour work? Or should I purchase this specific flour listed? Thank you!
Megan says
I highly recommend using pastry flour, however, if you only have all-purpose on hand just replace 2 Tbsp of each cup of pastry flour with 1 Tbsp cornstarch for every cup of flour used for a similar texture. Hope that helps!
Val says
Excited to try this! Ever try adding cocoa powder? I’m wondering how much to add per layer. Thank you!!
Megan says
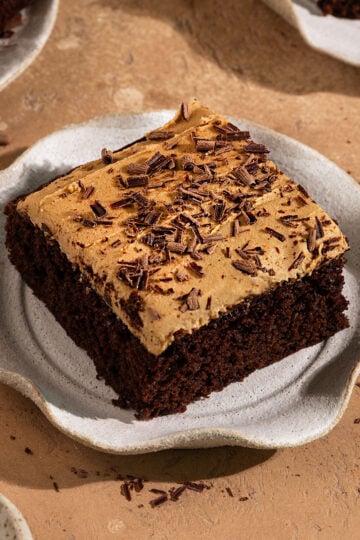
Adding cocoa powder to this cake would make it super dry and wouldn't work for this recipe. If you're looking for a chocolate cake I'd recommend my Chocolate Bundt Cake and you can always add sprinkles to it :).
Ani says
Can pastry flour be substituted with cake flour? How to make pastry flour at home?
Megan Horowitch says
There are instructions in the blog post and recipe card on how to make pastry flour at home. Cake flour should work 1:1- it's a bit lower in protein than pastry flour so you may even want to add in an extra 1-2 Tbsp of flour to help with structure. Let me know how it goes!
Sophia T. says
Hi! I really want to try this cake but I don’t have 8 inch pans. Can I use my two 9 inch pans? Thanks!
Megan Horowitch says
I think it should work, but you will likely have to adjust the baking time to be a bit longer. However, since I haven't tried it I'm not 100% sure on the timing. Each pan should be filled more than 2/3 full for reference :).
Kim Smith says
So excited to make this cake for my little lady's first birthday! Is the recipe above for 1, 8" cake pan? Or meant to be spread between 3, 8" cake pans?
Megan Horowitch says
Oh how exciting! The recipe lists ingredients for 3 8" cake pans and the amount for 1 8" cake pan in parentheses labeled as one cake layer. The frosting is listed as the amount to make for the entire three-layer cake as well. Let me know if you have any other questions!
Tee says
Two Questions! If I wanted to use 6 inch pans, do you know how much I should decrease the recipe by? (If not that's ok, I have 8 inch pans, was just trying to decrease the amount of cake I have access to lol)
Second question! For the buttercream. Does it matter the shortening? Can I use crisco? There was one blog post I read about not using crisco so I was trying to find a recipe that had success with a vegetable shortening that wasn't $20 or required shipping lol.
Megan Horowitch says
Unfortunately, I'm not sure what to decrease the recipe by with 6 inch pans. You could always make the same amount of batter, fill the cake pan up 2/3, and then make 1-2 cupcakes with any additional batter if you want a smaller cake. I know that doesn't reduce the extra cake problem, but cupcakes can be easily frozen for later!
For the shortening, I haven't personally tried crisco in frosting, but I don't see why it would not work! The shortening can be replaced 1:1 for vegan butter, so you could always replace the shortening with 1/2 crisco and 1/2 vegan butter to be safe! It may be a bit softer, but if thats the case just add it to the fridge for a few minutes to firm it up before frosting the cake. Hope that helps!
Megan Horowitch says
Thank you for the great feedback! Can't wait for your family yo try it and the cookies too 🙂
Bhumi says
This isn’t a 5-star cake... it’s a 10-star cake! We made one layer to test it out and I wish we’d gone to the three layers....the texture and taste of this cake are absolutely divine and what I love about this recipe is that it’s simple....no searching for tough to find ingredients...We’re making this cake again for the weekend and I can’t wait to share it with family..will be trying the funfetti cookies this week too! Thanks Megan for such a wonderful recipe. It’s hit in our home and is one of the best cakes we’ve had!
Megan Horowitch says
Thank you so much Jane I'm SO happy you liked it!
Jane says
I just made my first funfetti cake.
I want to thank SGTO so much for her wonderful recipe.
Not only was the cake easy to make with great instructions, but it was moist and delicious.
I’m so excited to share my cake with everyone. Especially non vegans who will never know the difference.
Thanks so much Megan !!!
Can’t wait to try all of your other recipes as well.
Dee says
What a beautiful cake!!! Looks so moist and delicious! Congratulations on the. Ew mile stone, can’t wait to see what is next!
Dee says
What a beautiful cake!!! Looks so moist and delicious! Congratulations on the. Ew mile stone, can’t wait to see what is next!
ShortGirlTallOrder says
Thank you so much Dee!!